
Still need to add the 1" stringers, finish up a little more welding, and add the light tabs so I can mount the KC Daylighters back on (at the top of the stinger - since there's a Warn 8274 winch going in there soon).
Nerf Bars & Homemade Front Bumper
So my pal Jim got tired of looking at my Jeep's ratty-assed-out corners and decides sometime around 2005 to buy me new sheet metal corners for a Christmas present. As usual, my laziness had them living in the garage for several years until I finally got off my ass and decided to do something about it (fall 2009, story and pics HERE).
Now that it's spring 2010 and the corners are all done, I needed a new tire rack. Since the full size spare (33x12.50 on a 15x10 steel wheel) is WAY too heavy for the rack to be mounted to the corners (factory style), and the old rack is an eyesore, it's time to clean things up and make something much sturdier (story and pics HERE).
Now it's time to mount up a cool Warn 8274 winch Jim gave me for my birthday (he scored one from an AHS customer for cheap, and passed it along to me since he already had one - we're good like that with our 'Hook a Brother Up' kind of deals.
The put the winch on, I ordered a mounting kit from 4WD Hardware, and figured I'd have to get rid of the cool aluminum diamond plate bumper/frame cover I've had for so many years. I also took this opportunity to fabricate a custom bumper based off a cool pre-runner style unit I'd seen on the 'net, as well as the one on my friend Toby Harrel's Great Pumpkin Blazer that I've admired for years.
|
|
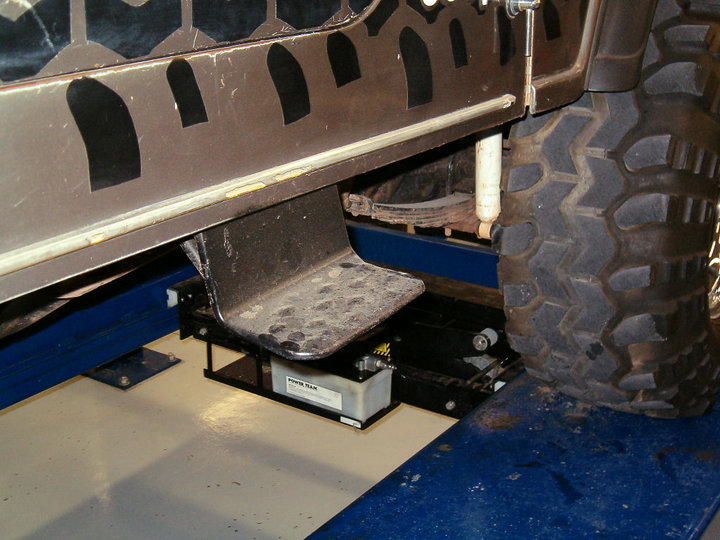
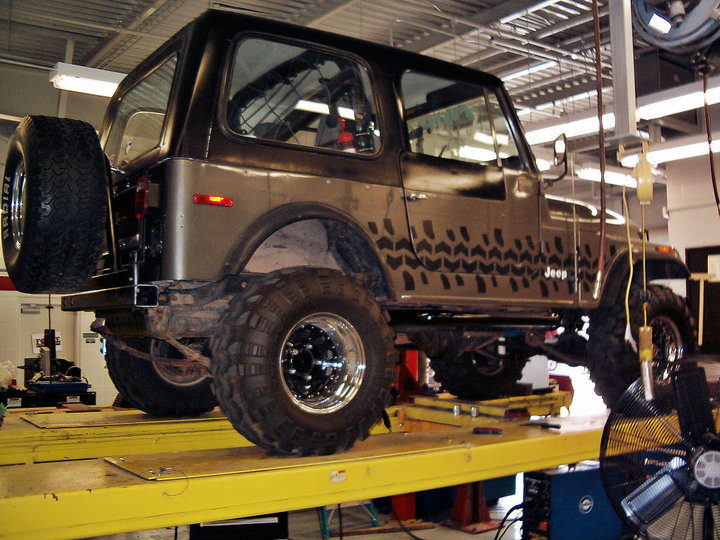
1. Here's the passenger side with the lame factory step still installed. I started off this day hoping to be done with everything in a few hours... but all I managed to do was get the steps removed. |
|
|
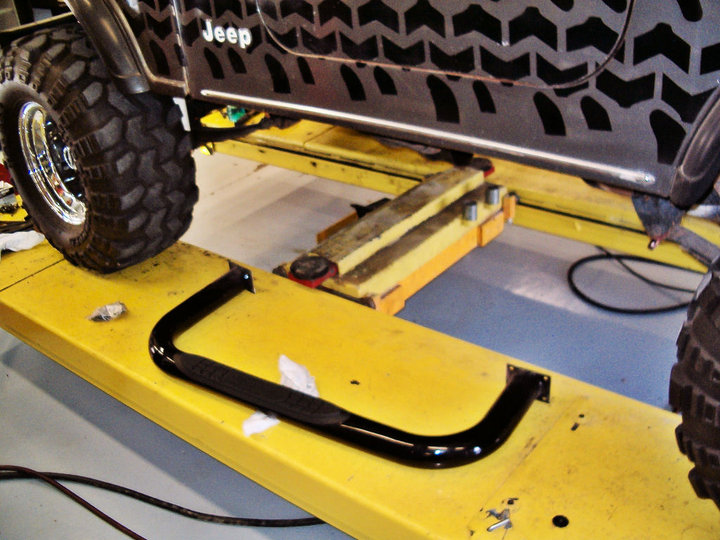
2. 3 weekends later (after finally ordering and receiving a set of Smittybilt nerf bars) we're ready to put these suckers on. Don't want to drill 32 holes in the frame (too much time and work), so I'm going to weld these bad-boys on. |
|
|
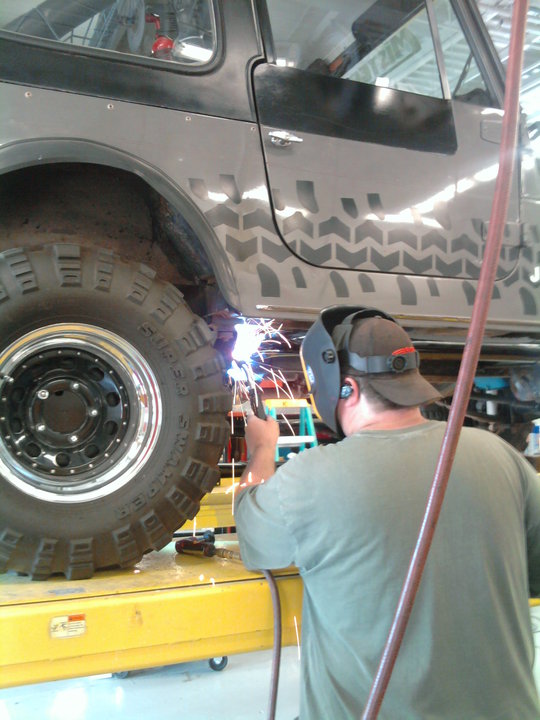
3. After cleaning the dirt and factory paint from the frame and powder coating from the edges of the mounting plates, I hooked up the ground line and zapped on the passenger side. MUCH better than those sucky steps. |
|
|
4. Someone actually caught a pic of me working on this - can't remember if it was Jim, Tony, or Gonzo. Whomever it was, Thanks! |
|
|
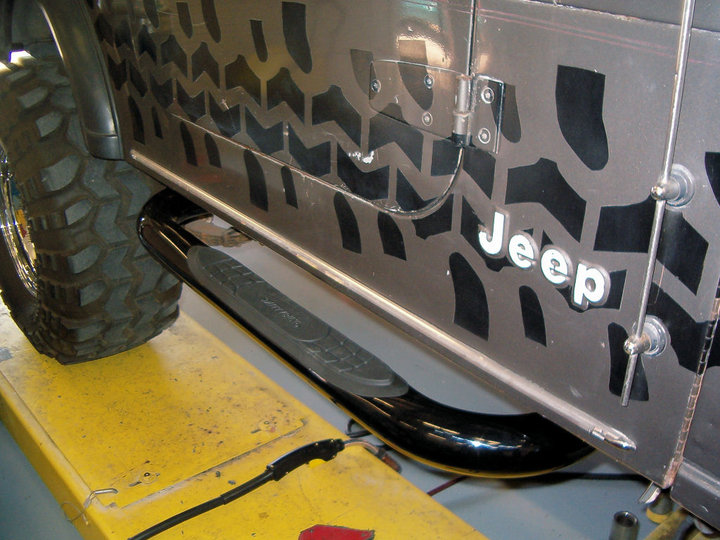
5. Passenger side mostly done - I just need to get back under there and make more sparks to finish up. Already did the driver side as well - but here's what they look like from the side. |
|
|
6. And this is what they look like from the front - they stick out just far enough to step onto when getting in and out of the Jeep... and stick out just that much too far for those of us who really don't need them to get in or out. Whatever - they're cool. All of my 4x4s have been equipped with nerf bars (except maybe the Blazer and black Nissan King Cab - didn't have them long enough to get some bars installed). |
|
|
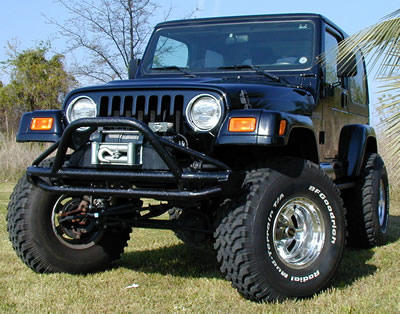
I've been tossing around the idea of a pre-runner/stinger style front bumper for a long time. Now that I have some spare time and motivation to play with the welder, it's time to fab something up. This is one of the online pics I've been drooling over - not only is it a cool TJ Wrangler, I love the front bumper. Being practical by not wanting to spend damn near $500 for a bumper, and realizing that they don't make 'em for CJs anyway, it's time to see what I can come up with. |
|
|
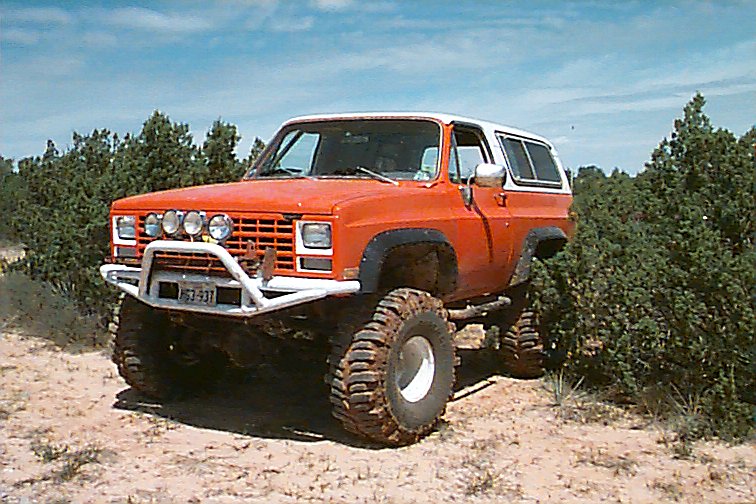
This is my friend from the Concho 4 Wheelers Toby Harrel's awesome Blazer, The Great Pumpkin. It's been to Four Wheeler Magazine's Top Truck Challenge a few times and even won! The bumper was a homegrown unit, fabricated by either Toby or one of his buddies, and I just fell in love with it the first time I saw it. Hopefully, I'll be able to duplicate it to CJ-7 scale and make it work on mine. |
|
|
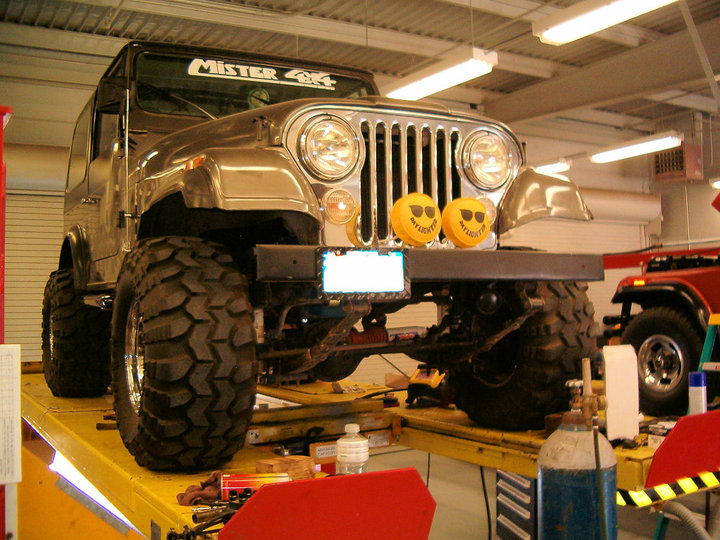
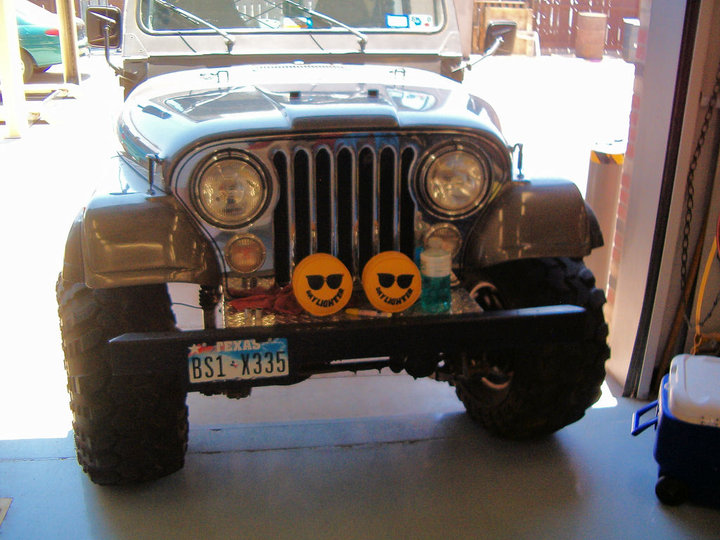
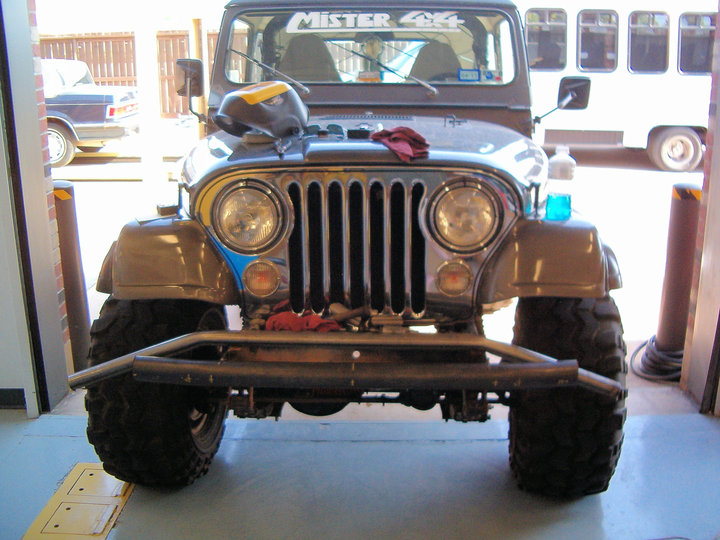
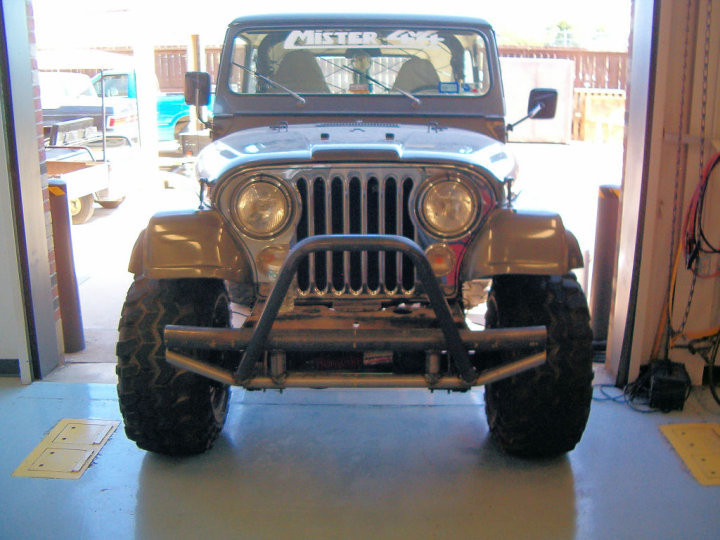
1. Take a good look - here's the last time the Jeep will look like this from the front. Here's the stock bumper, KC Daylighters, and aluminum diamond-plate frame cover that have been the distinctive look of my Jeep since 1996. |
|
|
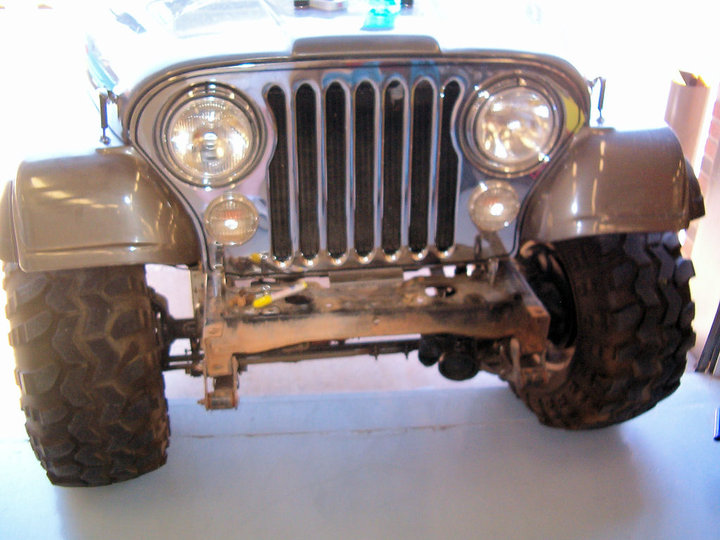
2. Off with the old... [hopefully soon] on with the new. I'm sure Jim will make me clean and paint the frame before I get the new stuff put together. My head wasn't really in the game today, so all I got done was taking things apart and fabricating the brackets for the main tube. It was ONLY 106 outside... that's all. |
|
|
3. I bought all of the tubing plenty big to make sure I had enough to work with. Here's the main tube tack-welded onto the brackets I fabricated yesterday. Even though it was a little cooler (by who's standards?) at ONLY 98, the humidity was enough to choke even a thirsty fish out of water. |
|
|
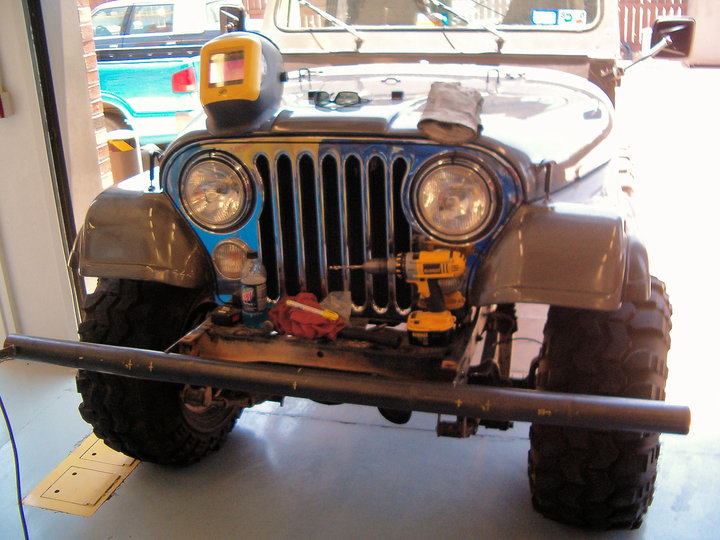
4. Apparently, my tack welding sucks, as I had to pick up and reattach the main tube no less than 3 times before I got to this point. The first attempt had the bumper 'frowning,' which was not what I wanted. After straightening it for the second attempt, it fell off when I loosened a bracket. Then I was mad and decided to cut the tube to length and tack it back on. |
|
|
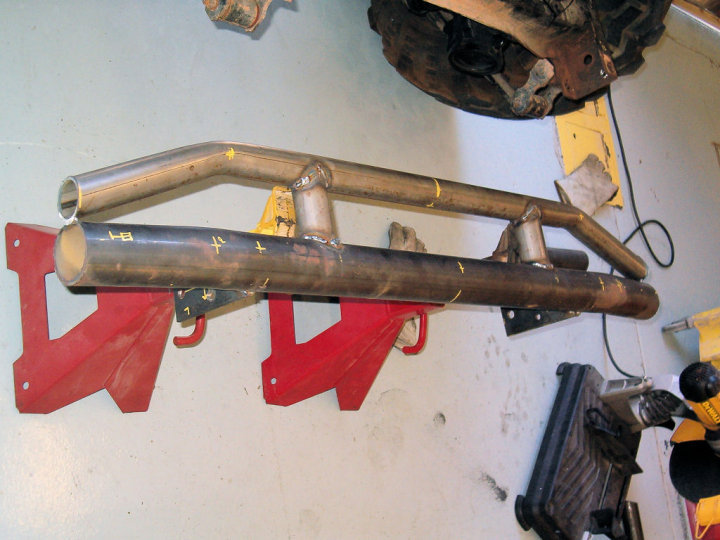
5. Here we are at the end of the day, and I finally got the bottom tube bent how I wanted it. I also made some spacers for the center portion using the chop-saw and 'fish-mouth' tool (which is hard to explain why they call it that). I was worn out and just dropped the lower tube on top of everything and took the pick. I also discovered that I'm 1 2" tube short of my goal, so I'll need to get another one before next weekend. |
|
|
6. I finally got a piece of tubing that will work for the stinger (3rd try... who knew?), so now it's time to put this whole thing together. Today, I felt smarter (for some reason unknown to me) and used the jack stands and tie-straps to hold stuff together while tack-welding, rather than trying to balance it on my own. |
|
|
7. After I got it all tacked together, I pulled it off, cut the bottom tube to length, and began welding. My welds are getting better, but still kinda suck. Oh well - that's what the grinder and paint is for. Shortly after taking this picture, I ripped open my right index finger on a stray piece of welding wire I didn't notice I'd left - those things are sharp! |
|
|
8. After cutting the stinger to length, 'fishmouthing' the ends (or notching, if you prefer), and welding it onto the bottom tube, this is what we have. I had made some mounts early on that makes taking off/putting on this whole mess a lot easier. I'm off a little to the right taking this picture, but it really is squared up in the center. |
|
|
8. 3/4 view that show some of the cool angle I was going for. A good friend's son did the math for me and came up with the angles for the 'stinger.' They were perfect, but I forgot to take into account the radius of the bends when measuring... so I had to bend the tube again, a little tighter - which worked out awesome! |
|
|
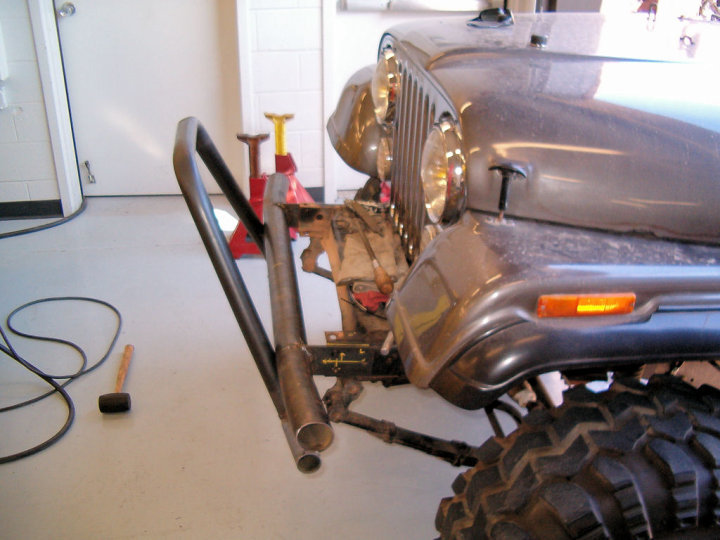
9. And here's one
from the side. I put the angle in because I saw another Jeep come off a wall
that was too high for his wheelbase and almost did an 'endo.' The angled
'stinger' not only looks cool, but prevented the Jeep from going over on its
lid. |
|
|
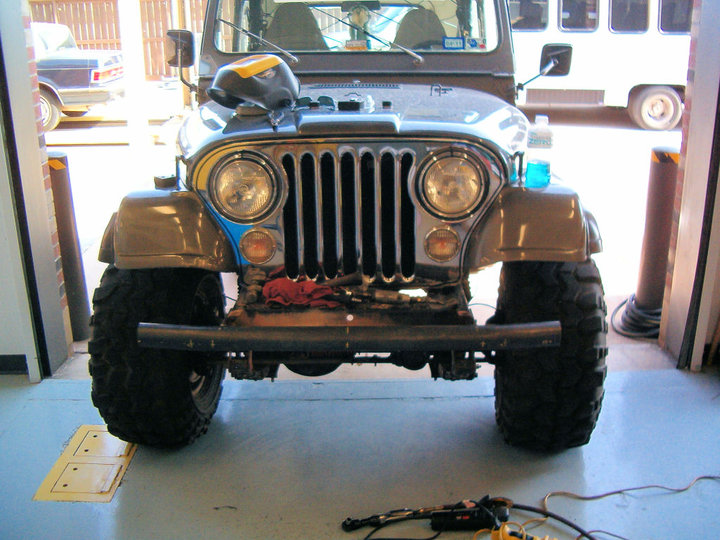
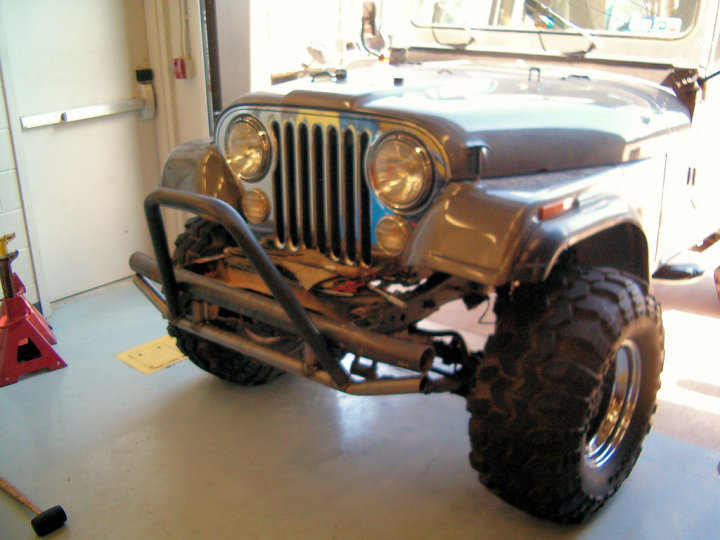
10. Here's a more
centered shot from farther away - I'm still a little off-center though. I'm
not entirely sure everything is perfect, either... but I'm really happy
considering I 'eyeballed' a lot of it. Still need to add the 1" stringers, finish up a little more welding, and add the light tabs so I can mount the KC Daylighters back on (at the top of the stinger - since there's a Warn 8274 winch going in there soon). |
|
|
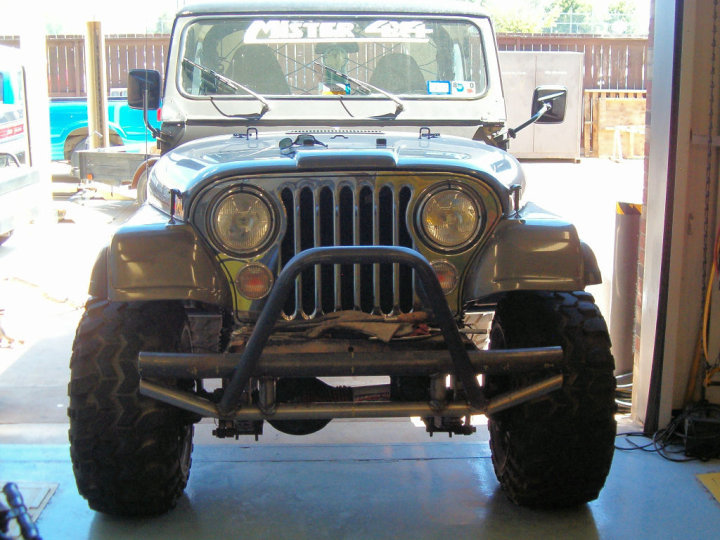
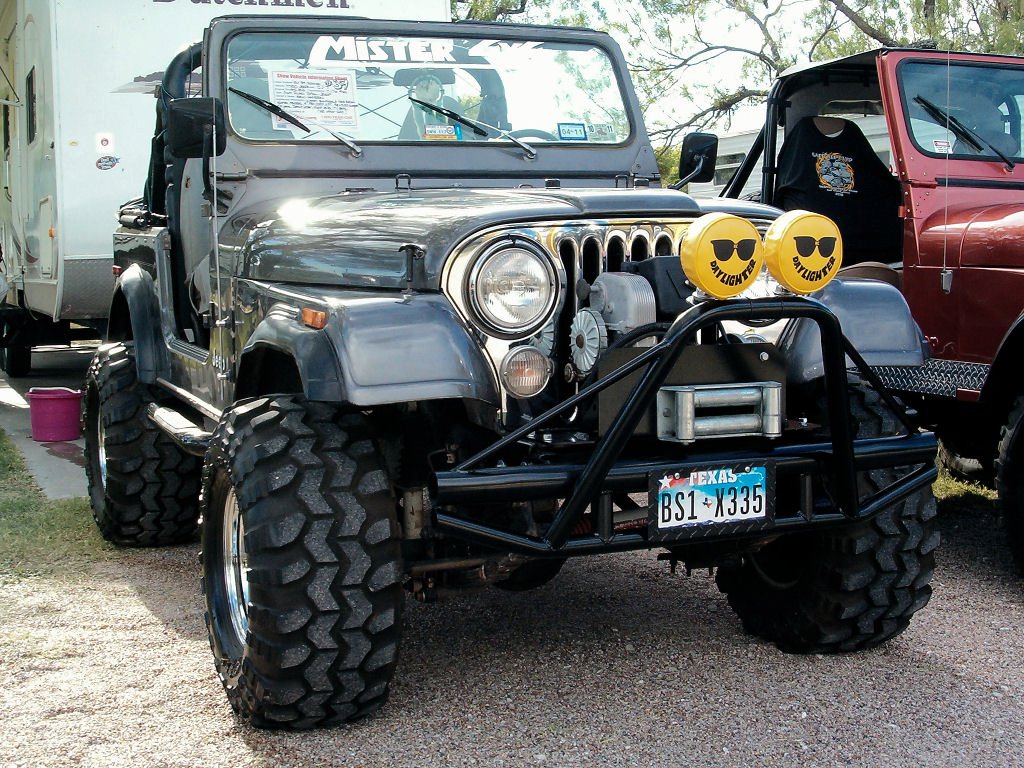
11. Done. Looks like I'd forgot to grab a pic of the finished product once I'd gotten it done. This was taken last October 2010 at the Goodfellow AFB Car Show at the Rec Camp with the winch mounted up and everything. Turned out pretty cool - I'm pleased with it. |
Next Projects: Engine mods (Clifford Intake, Borla Header, Holley Sniper Fuel Injection, valve job, clean up the engine compartment), adapt the TJ seat brackets to fit the seats better, do something different with the Mister 4x4 graphics.