Building
Kevin's new machine - Paint & Finish
 This
is the monitor that was sent from Pappy, and the keyboard given to me by AceHigh,
members of 4peeps.com. A black Dell 17" Trinitron monitor, and a Micro
Innovations 108-key keyboard - or at least the outer casings of both of them.
I have big plans for these two.
This
is the monitor that was sent from Pappy, and the keyboard given to me by AceHigh,
members of 4peeps.com. A black Dell 17" Trinitron monitor, and a Micro
Innovations 108-key keyboard - or at least the outer casings of both of them.
I have big plans for these two.
 After taking the
keyboard apart, I discovered that it was not assembled in the usual way.
So rather than masking off all of the keys and not getting a consistent paint
job, I decided to simply remove the keys, at my pal Jim's suggestion. Yes,
I took a picture of the keyboard for reference to get this sucker all back
together in the right places.
After taking the
keyboard apart, I discovered that it was not assembled in the usual way.
So rather than masking off all of the keys and not getting a consistent paint
job, I decided to simply remove the keys, at my pal Jim's suggestion. Yes,
I took a picture of the keyboard for reference to get this sucker all back
together in the right places.

 After I primed the
pieces, the pieces towards the front needed to be pained orange... Chevrolet
Orange, to be exact. So I painted the top of the keyboard and the front
bezel of the monitor first.
After I primed the
pieces, the pieces towards the front needed to be pained orange... Chevrolet
Orange, to be exact. So I painted the top of the keyboard and the front
bezel of the monitor first.

 After the orange, it
was time to put down some of the metallic blue from the now famous paint job of
the #24 car. Since I had sand-blasted the bottom of the chassis, I primed
and painted the blue base coat. I had also shot the back half of the
monitor and bottom half of the keyboard cover as well, but it looks like I
forgot to take pictures of them.
After the orange, it
was time to put down some of the metallic blue from the now famous paint job of
the #24 car. Since I had sand-blasted the bottom of the chassis, I primed
and painted the blue base coat. I had also shot the back half of the
monitor and bottom half of the keyboard cover as well, but it looks like I
forgot to take pictures of them.
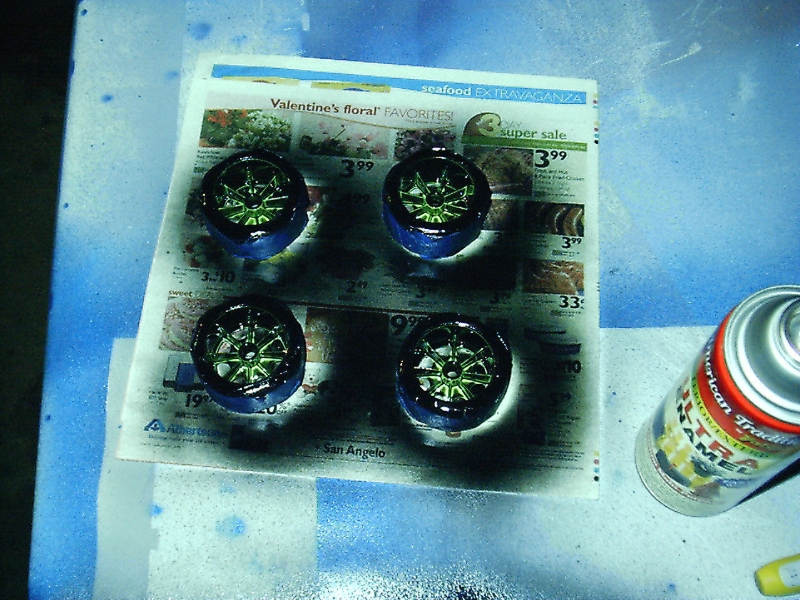
 The
wheels needed paint as well, since they came in a lovely shade of barf yellow.
I simply masked off the pre-mounted tire surfaces and shot the black glossy
enamel.
The
wheels needed paint as well, since they came in a lovely shade of barf yellow.
I simply masked off the pre-mounted tire surfaces and shot the black glossy
enamel.
 Since
the CD-ROM was going to be hanging out of the driver's side of the car at the
bottom part of the body, I needed to toss on some orange in hopes to blend in a
little better than basic black. I masked off everything except the drive
door, including the activity LED in the drive door. I also rolled up a
small piece of tape and crammed into the manual release port of the door, to
prevent overspray from sneaking in and messing up the drive optics.
Since
the CD-ROM was going to be hanging out of the driver's side of the car at the
bottom part of the body, I needed to toss on some orange in hopes to blend in a
little better than basic black. I masked off everything except the drive
door, including the activity LED in the drive door. I also rolled up a
small piece of tape and crammed into the manual release port of the door, to
prevent overspray from sneaking in and messing up the drive optics.
 Here's
where the idea of painting the underside of the chassis pays off. I masked
off and sprayed some Chevy Orange flames, to bring the bottom of the chassis
along with the rest of the paint job theme. To tighten up the flames, my
wife picked up some of those 'Shake -n- Paint' pens in gold... they did the
trick. A nice big '24' decal would finish this off, but I didn't get a
picture of it either.
Here's
where the idea of painting the underside of the chassis pays off. I masked
off and sprayed some Chevy Orange flames, to bring the bottom of the chassis
along with the rest of the paint job theme. To tighten up the flames, my
wife picked up some of those 'Shake -n- Paint' pens in gold... they did the
trick. A nice big '24' decal would finish this off, but I didn't get a
picture of it either.

 Here's
the monitor all painted and reassembled. Turned out pretty cool. The
keyboard had already been put back into its box for protection at this point.
Here's
the monitor all painted and reassembled. Turned out pretty cool. The
keyboard had already been put back into its box for protection at this point.
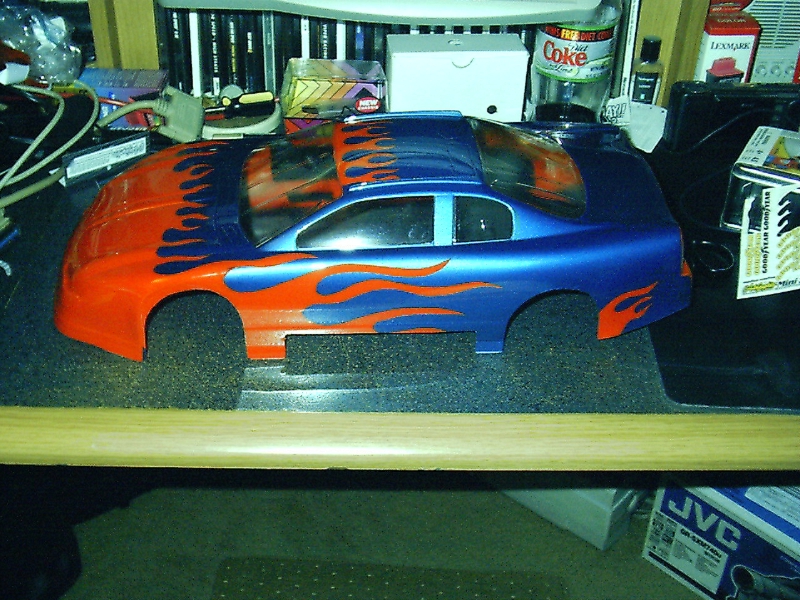
 And
finally, here's the body with all the paint laid down. The rest of it's
going to be decals, but here's what it looks like underneath. The paint
was kind of a pain, since I had to use the metallic blue first, with the flames
masked off. The paint was so translucent that I had to lay down several
coats to make sure the orange didn't show through. As a result, the paint
was so thick, it wanted to come off with the tape. So I had to re-cut the
flames between the paint and the tape before I could pull the tape off and spray
the orange. Turned out OK.
And
finally, here's the body with all the paint laid down. The rest of it's
going to be decals, but here's what it looks like underneath. The paint
was kind of a pain, since I had to use the metallic blue first, with the flames
masked off. The paint was so translucent that I had to lay down several
coats to make sure the orange didn't show through. As a result, the paint
was so thick, it wanted to come off with the tape. So I had to re-cut the
flames between the paint and the tape before I could pull the tape off and spray
the orange. Turned out OK.
The rest of the finish
work took place as I was installing the operating system, between pushing the
'OK' button of the Windows XP install.
Page 1
Page 2
Page 3
Page 4

 This
is the monitor that was sent from Pappy, and the keyboard given to me by AceHigh,
members of 4peeps.com. A black Dell 17" Trinitron monitor, and a Micro
Innovations 108-key keyboard - or at least the outer casings of both of them.
I have big plans for these two.
This
is the monitor that was sent from Pappy, and the keyboard given to me by AceHigh,
members of 4peeps.com. A black Dell 17" Trinitron monitor, and a Micro
Innovations 108-key keyboard - or at least the outer casings of both of them.
I have big plans for these two.