Building Rusty - October 2003
I
sat at my computer desk one day and listened to the BIOS alarm on my main
machine going off. I realized that
the new machine I had just built to run my website, FTP site, and act as
software router that I had placed under the desk right next to it was causing
cooling issues with Big Dawg. So,
looking around, I tried to figure out where I could put the new box to keep Big
Dawg happy, and still be able to use my KVM switch between the two.
Nothing looked good, and then it hit me ñ build a machine that looks
like a NASCAR race car and put it on a shelf above my desk so it looks like
itís part of my Rusty Wallace collection of die-cast race cars.
I
was a big fan of the GTR-PC I saw on the internet a few years back (Iím still
apalled that someone actually stole that machine), and that served as a huge
part of my inspiration to create the machine you see now.
Except that he had used a 1/8th scale remote control car body
for his machine, and there were no NASCAR bodies in that scale ñ Iím also
into R/C cars as a hobby. So I realized I had to go smaller scale in the 1/10th
range, which would give me quite a selection of bodies, wheels, tires, etc, to
choose from.
I
scored a sheet of 4mm aluminum, the Parma 2001 Taurus Super Speedway body, some
Pro-Line Green pre-mounted foam tires, and a couple of NASCAR Taurus decal kits.
I cut a test chassis out of cardboard to fit to the body, then began my
measurements. Not just any
motherboard would fit into the chassis and tuck under the body, so I went with a
Gigabyte K7 Triton Micro ATX mobo, since it was only 190mm X 243mm ñ which
would fit in there nicely. I also
decided to go with a laptop CD-ROM, Micro ATX power supply, and elevate the mobo
on some extra brass stand-offs so I could stuff the hard drive under there.
There wasnít much room to put stuff on top of the mobo and have it all
still fit under the body. I also decided to exclude a floppy drive, since there
wasnít much room for it, and who uses floppies anymore anyway, right?
My other big problem was how to get two NICs necessary to run as a
software router. One was already
on-board the mobo, so I snagged a 90 degree port-adapter card and laid the NIC
down across the board. And it just
barely clears the hood.
After
several test-fittings, I cut the chassis out of the aluminum sheet with a jigsaw
(after I saw what a plasma-cutter did to the sheet aluminum, I figured Iíd get
a cleaner edge doing it the old way. After
several hours of cleaning up the edges with a file and Dremel, I found some
1îx1î aluminum L-channel stock and made the wheel mounts, which I
pop-riveted to the chassis. I also
had to cut a square hole in the back for the power supply fan to hang out of
(literally) for ventilation. I also
found the need to bend the chassis upwards of 15 degrees in the back to stay
tucked under the body. The power
supply barely fits under the ëtrunkí now.
I
had to custom-fab a bulkhead for the power switch & LED and the reset switch
and hard drive light. For that, I
used the same 1îx1î aluminum L-channel I used to mount the wheels to the
chassis with. After that, I located
everything and drilled the necessary holes to mount everything.
I hand-polished the chassis, since I wasnít smart enough to polish it
before I pop-riveted the wheel mounts on. I
also discovered that the power supplyís power cord wouldíve come out of the
body in a bad place, so I took it apart and hard-wired the power supply cord to
the power supply.
Now
it was time to put everything on the chassis.
Surprise! Everything fit.
I mounted the hard drive under the mobo with its interface towards the
driverís side so I could fold the cables under for a cleaner look.
The laptop CD-ROM was mounted using double-stick ëservo tapeí ñ
which I thought was fitting since so much other R/C car tech was used on this
project so far.
I
painted the wheels and body and realized that the NASCAR Taurus decals were not
the ones I needed to use. Plus,
nobody made a decal set for Rusty Wallaceís #2 Miller Lite Special.
Imagine that ñ Iíve had a hard time finding any good collectible
stuff for him, so why should this be any different?
So, between MS Paint, PaintShop Pro 6, and PhotoShop 6, I was able to
make the decals and print them out on adhesive-back photo paper ñ a few were
scanned or ripped from actual pictures of the real car, but the rest were drawn
by me. Getting the decals to fit
was tough and took many attempts, but I think I got it worked out fairly well.
Plus, it looks like itís part of my Rusty Wallace collectibles and most
people that see it canít believe that itís a computer.
System
Specs:
The pictures below are some basic highlights of the construction process and the finished product. I have more that I'll be adding soon.
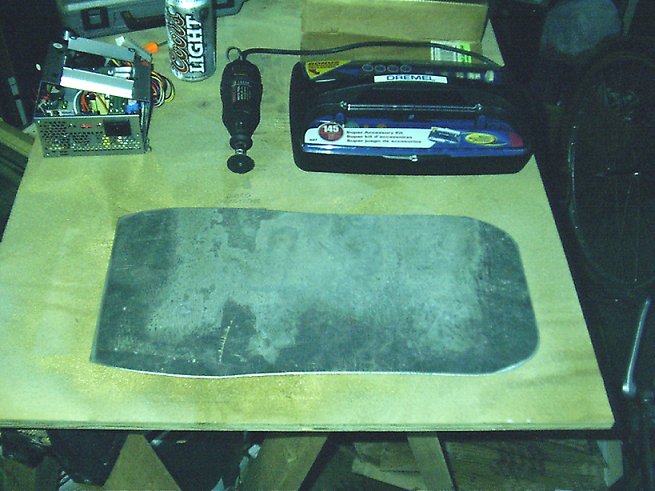
Here's a shot of the chassis pan after it was cut out. The power supply is torn apart ready for the power cord to be soldered straight into it, since the cord would require another hole straight out the back... and we can't have that.
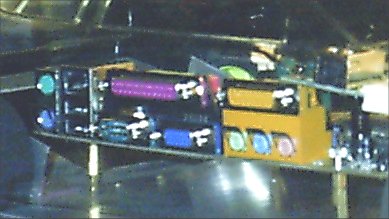
Here's one of the brass standoffs used to hold the mobo above the hard drive and CD-ROM. I also used this picture to tease my friends when I wouldn't tell them what I was planning. You can just make out the window outlines, since the body was mounted as well... (which is why it's all blurry)
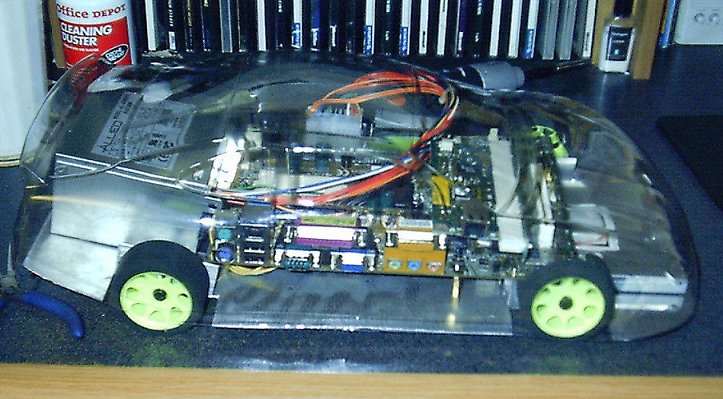
This picture shows the components mounted, and the body ready to have the wheel wells cut out. Then paint and decals were next - and that would pretty much be it.
Tires are painted and stickered. The ribbon cables folded and tucked. The power cord wrapped in split-loom. All it needs is a body now.

But! Let's take it apart one more time and polish that chassis. This was as far as I got after 6 hours - I finished up the rest the next day. I really wish I had not pop-riveted the wheel mounts before polishing, as I have new scars on my knuckles as a result. As you can see, the body's painted and waiting for decals now. Soon... very soon.
It's all back together now, and I finally remembered to switch my camera to 'detail' from 'landscape.' The power bus was made from the same angle aluminum the wheel mounts were and mounted with R/C double-stick servo tape. I even drew in the 'lugnuts' with my silver Sharpie.
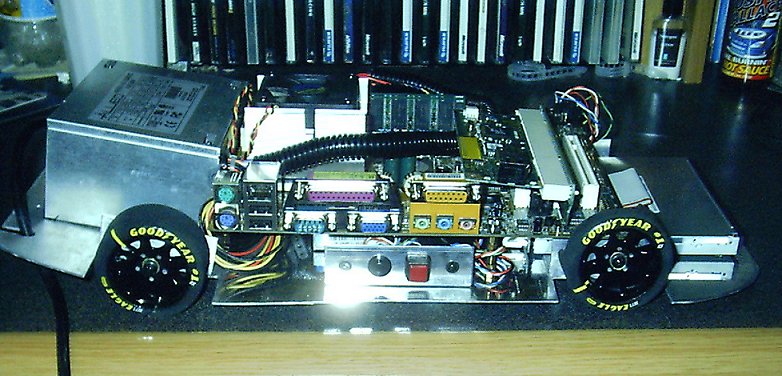
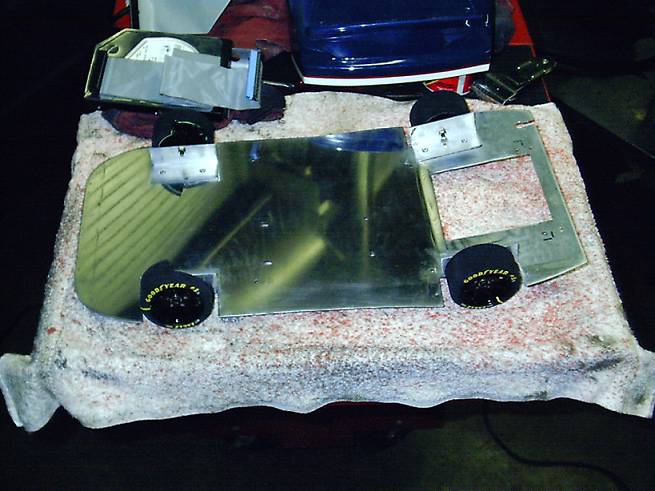
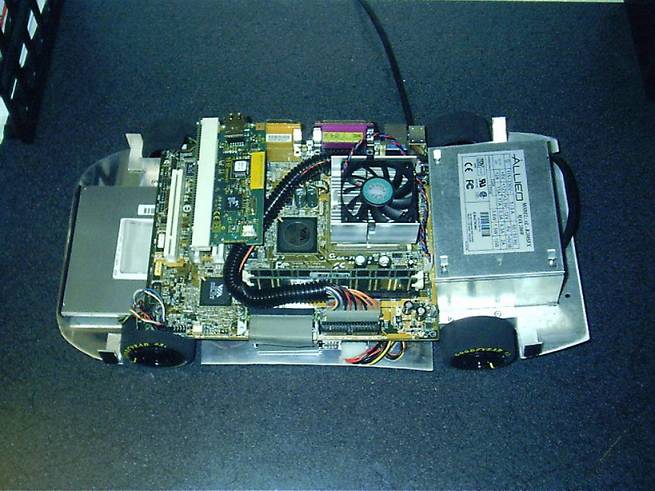
Here's a top-down shot. You can see I had to notch the back of the chassis to provide room for the power cord to escape - yes... it's that tight in there.
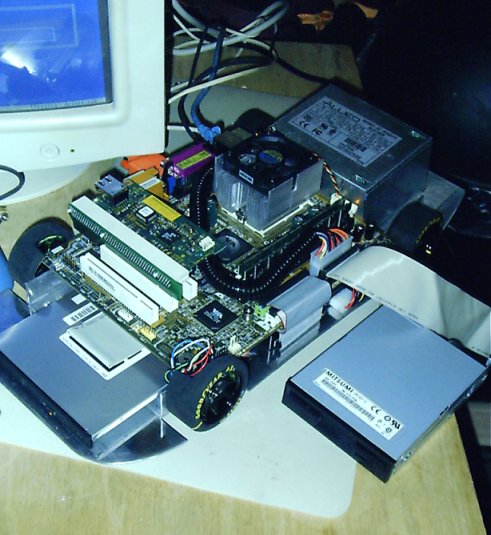
Here we are installing Win2K Adv Server. I didn't have room for the floppy drive I'd bought for it, and I figured I wouldn't need it past the installation point, so I just plugged it in temporarily. Like a bonehead, I didn't remember that I could boot from the Win2K CD rather than the setup floppies until after I'd already gone through the hassle of using the floppies. Hey - it was a long night.
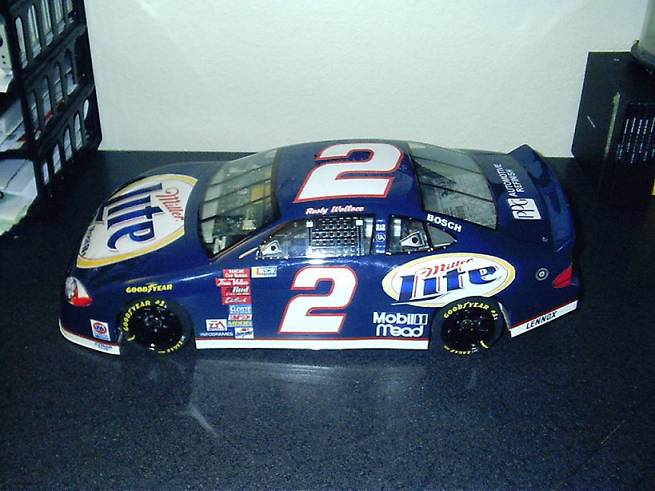
Here's a nice shot of the front and left side all mounted and stickered. The body I had to use is a little distorted in comparison to the real car's shape to accomodate the remote control car chassis, so the decals came out a little different than the real car's pictures would show. Close enough though as I was very pleased with how they turned out. Be careful using adhesive-backed photo paper for decals on Lexan - it's tough to get them back off once they're down, and forget getting them off in one piece if you have to.
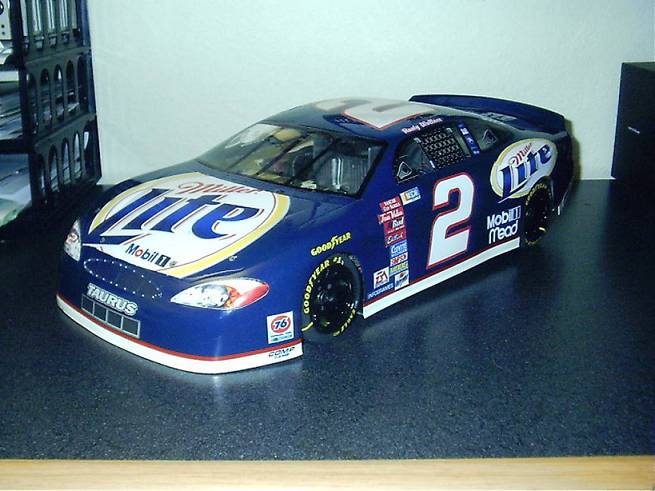
Left Side - I love how it turned out.
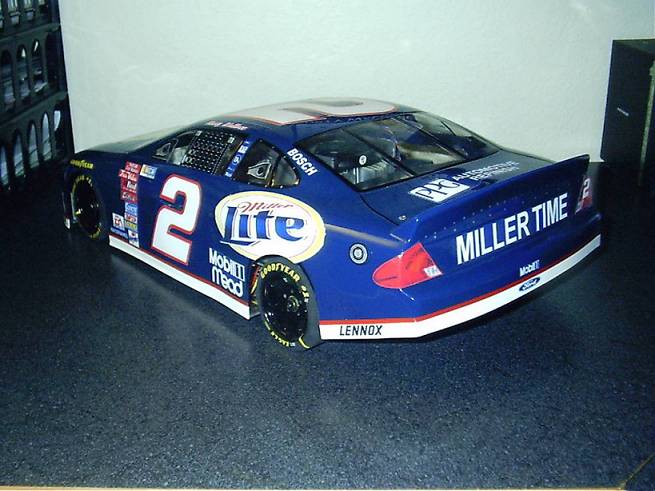
And one more from the back. The pictures really don't do it justice, since the flash kind of washed out the colors and some detail.
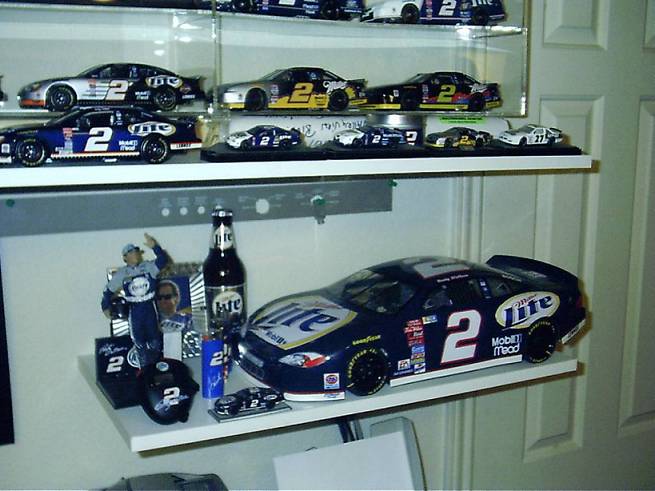
And finally, here we are in operation. The machine sits on its own shelf above my inkjet printer on the right side of my 'L' shaped desk. I notched out the shelf where it rests against the wall to allow the computer cable bundle to drop to the power strip, switch, DSL modem, and KVM switch. On the shelf above, you can see a small portion of my many Rusty Wallace NASCAR die-cast collectible cars. The way it blends into everything is the very reason I built this machine.
More pictures and details will be available soon. I just wanted to get this up quickly. Thanks for checking out my junk.
Visit my Rusty Wallace page: HERE
So far (13 July, 2004), Rusty has won a Poseidon WCL-03 Water Cooling system in a case modding contest from PC Unleash.com which if there was only more room, would find its way in there. Oh well - it'll help one of my other machines.
![]()